A running toilet is more than just an annoying sound in the background of your day-by-day life; it means wasted water and expanded utility bills, which can add up altogether over time.The great news is that fixing a running can is for the most part straightforward and doesn’t necessarily require proficient plumbing services.
In this comprehensive guide, we’ll cover the steps to diagnose and resolve common issues such as a toilet flapper that spills after substitution, a flapper that doesn’t seal properly, and what to do when you’ve replaced the flapper but the toilet proceeds to run.
Understanding Why Your Toilet Keeps Running
A running toilet ordinarily comes about from faulty mechanisms inside the can tank. Issues can emerge from different components, counting the flapper, the fill valve, or the flush valve gathering. Legitimately diagnosing the issue is the to begin with step in making compelling repairs.
Key components to check include:
The Flush Valve together:
This incorporates the flush valve and its situation, which the flapper seals against. Issues here can cause leaks.
Step-by-Step Direct to Fixing a Running Toilet
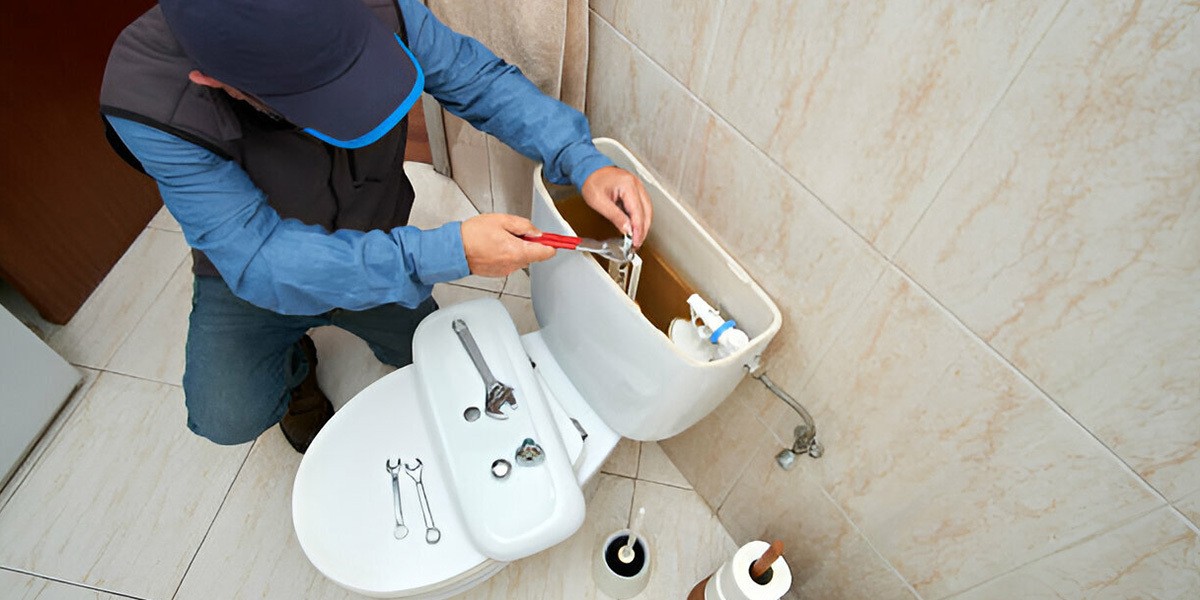
Step 1: Analyze Flapper Issues
A flawed flapper is frequently the guilty party for a running can. If you can flapper is spilling after substitution, check that it’s the rectify sort for your toilet show and is introduced appropriately. Flappers must make a tight seal; something else, water will proceed to stream from the tank into the bowl.
To guarantee your flapper seals correctly:
- Inspect the Flapper: See for breaks, twists, or signs of mineral build-up that may avoid a great seal.
- Check the Measure and Sort: Make beyond any doubt the substitution flapper is the suitable estimate and sort for your latrine. All-inclusive flappers do not continuously work on each model.
Step 2: Adjust the Flush Valve Chain
A common issue after replacing a flapper is having the flush valve chain either as well tight or as well free. If the chain doesn’t have the right sum of slack, it can anticipate the flapper from fixing properly against the flush valve.
To adjust the chain correctly:
- Allow Minimal Slack: The chain ought to have just enough slack to allow the flapper to completely seal without additional weight pulling it up or holding it absent from the valve seat.
Step 3: Assess and Repair the Fill Valve
If after tending to the flapper, your toilet still runs, the another component to check is the fill valve. A breaking down fill valve can cause the tank to overload, which comes about in water spilling into the flood tube and the can ceaselessly running.
Repairing a defective fill valve involves:
- Listening for Murmurs or Running Water: These sounds can demonstrate a spill in the fill valve.
- Using Color Tests: Put a few drops of nourishment coloring in the tank water. If the color shows up in the bowl without flushing, there’s a leak.
- Adjusting or Replacing the Fill Valve: Sometimes, the fill valve needs to be adjusted or replaced totally if it’s defective.
Step 4: Check the Flush Valve Seat
If the changed flapper toilet still runs, consider analyzing the flush valve seat, which the flapper closes against. Any harm or build-up on this situate can avoid a tight seal.
To repair the flush valve seat:
- Smooth the Surface: Utilize fine-grit sandpaper to expel any build-up or little blemishes on the flush valve situate that may avoid the flapper from fixing correctly.
Step 5: Test and Troubleshoot
After making the fundamental repairs and adjustments:
- Flush the Toilet Numerous Times: Guarantee that each component capacities as expected.
- Observe the Water Levels: Affirm that the water stops filling at the fitting level.
Maintaining Your Can Long Term
Regular upkeep is pivotal to anticipating latrine issues some time recently they begin. Frequently check and clean the flapper, valve situate, and other components. Too, consider supplanting the inner components each few a long time to keep everything working smoothly.
Conclusion
Tackling a running can through straightforward DIY steps can spare you cash and decrease water wastage. This direct ought to enable you to handle common issues such as a toilet flapper spilling after substitution or a flapper not fixing.
Keep in mind, if you experience complications or if the issue continues, counseling a proficient handyman is a wise choice. Successful support and opportune repairs are key to guaranteeing your can works productively, giving peace of intellect and contributing to natural preservation.